 Where Can I Get Great Fonts?I am often asked where I find my fonts. To be honest, I find 95% of the fonts I use on DaFont.com (I get hundreds on there for FREE) and the rest of the fonts that I use come from Teachers Pay Teachers. Many font designers on TpT have fonts you can download for free. Below are some great font designers with links to their TpT stores. To give you variety, I have listed established font designers and some of the newer, up and coming designers. If you know a fabulous font designer that I left off the list, please leave a comment in the comments section so all my readers can also discover that designer. Font Designers on Teachers Pay Teachers
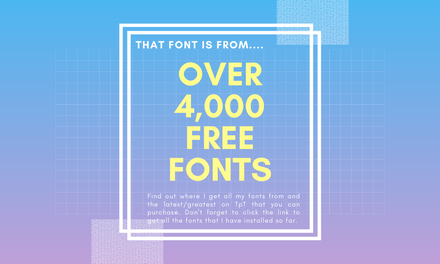
--> Free Fonts <--I have linked over 4,000 different fonts that I have collected over the years that you can download to use! None of them are fonts that I have purchased for personal use. Those fonts are linked above. Hope you enjoy!
20 Comments
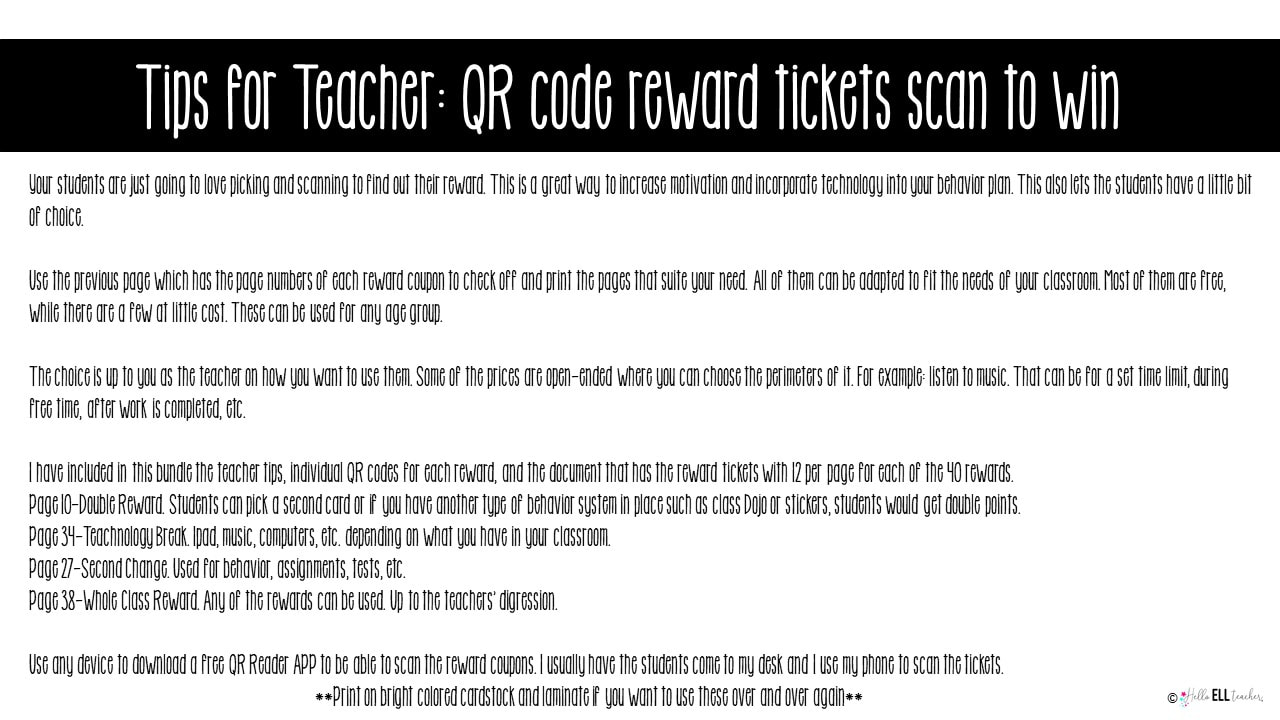
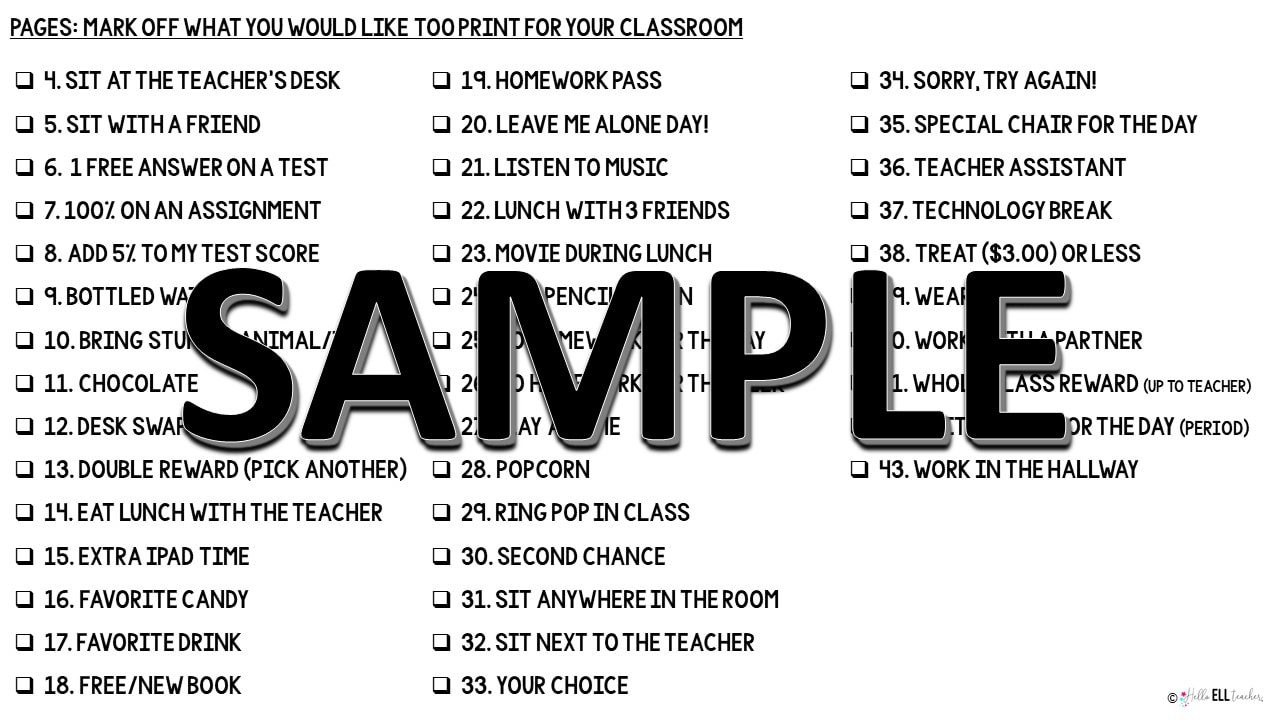
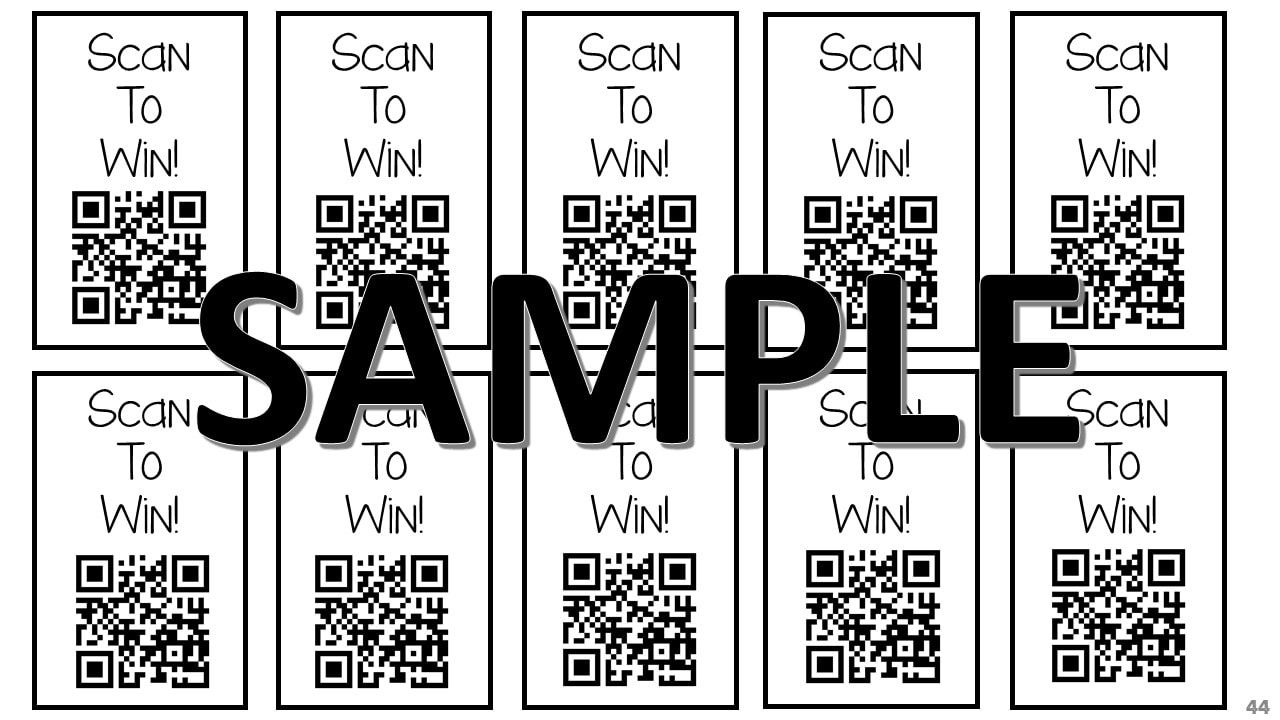
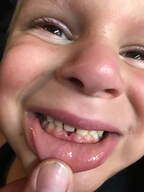 Last Saturday, we were taking a bath when I noticed that it looked like Jake had cracked his tooth. I made him smile and he was just perfectly fine. A couple days later, again it looked like his tooth was chipped. I went to look at his mouth again when Jakob announced that he had a tooth that was “super wiggly.” I figured he was exaggerating and was completely shocked when I watched him wiggle his tooth back and forth with his finger. YIKES! He wasn’t kidding! I knew it would only be a matter of days before we’d be expecting our very first visit from the Tooth Fairy! Being that Jakob is only 4.5 years old, I was not prepared for this next adventure that I was about to embark on. I had to do some quick pinteresting to get some ideas. I had the tooth box, purchased by my sister a couple of years ago and I miraculously remembered where I had stored it. But what else would be fun? Something that was just as super exciting as losing your first tooth. Something that he was going go remember. Jake has been waiting for a tooth fairy visit since he learned about what the tooth fairy was all about, so I knew it would be fun to play it up a little, at least for the first tooth. Then lo and behold, the day was upon us. On Tuesday evening, Jakob plucked that tooth out on his own while we were driving in the car home at 9pm. Not wanting to tell me what he did, he started crying and I had to pull over. Commence the shrieking, yelling, celebrating (from all of us). Actually, I was excited and then had a total mom moment and got all choked up and teary eyed as my kid reached yet another big milestone. We got Jakob to bed that night and it was finally time to put together a little Tooth Fairy magic! So first up, a gold dollar. For subsequent teeth, the Tooth Fairy will leave $1 per tooth. Our coin were pretty dirty so I used a jewelry cleaning cloth and it polished up like new! Next, I wanted to make some shiny sparkly fairy-worthy glitter money. Several of my friends have made these over the years and it has always topped my list of Tooth Fairy 101 Must-Makes. This was surprisingly easy. I used Elmer’s spray adhesive and iridescent glitter. I took all my $1 bills (a $5 bonus for losing the first tooth) and laid them on a paper towel. I sprayed the front with adhesive, sprinkled glitter, dumped the excess glitter. Then I repeated the process on the back and let the bill air dry for an hour or two. The result? GLORIOUS. And MAGICAL. Gold coin. Check. Glitter money. Check. I was ready to call it a night. Then, my eyes skimmed over this crazy cute idea for a printable tooth fairy receipt from The Larson Lingo. I had to make one! I am fairly crafty and techy and thought, "This is going to be a piece of cake." I was correct, it only took me 10 minutes to make my own receipt. 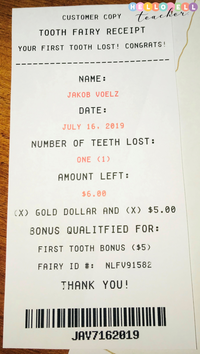 To make your own receipt, simply open up a blank MS Word Doc. You can download the fake receipt font for free. Make sure you download the font FIRST before you open up your MS Word Doc (otherwise the font will not be in the list). Then I used this barcode generator to create a barcode (I used his initials and the date he lost the tooth). After it generated my bar code, I did a screen shot of just the bar code and saved it as a .jpeg. On my Word document, I inserted it as an image to the bottom of my receipt. For the fairy ID I used my initials and my birth date. The font sizes that I used on the receipt were between 9-11. That gave it the more "realistic" look of a receipt. Template of my Tooth Fairy Receipt. Edit how you wish! Print the receipt and cut it down to a smaller size, similar to a real store receipt. Still there was something inside of me that needed more. Jakob had left a note and picture for the tooth fairy so I knew I needed to write a letter back to him. After a few minutes on pinterest, I found the best Tooth Fairy letter to print out (and was actually on a dentists website for parents to download). You can find the letter here! The Tooth Fairy was ready to spread some magic! It probably won’t surprise you, but the next morning he was utterly THRILLED and there was no containing his excitement (to be honest, he came into our room at 12:45am bouncing off the walls that the tooth fairy came and left him some really awesome stuff). 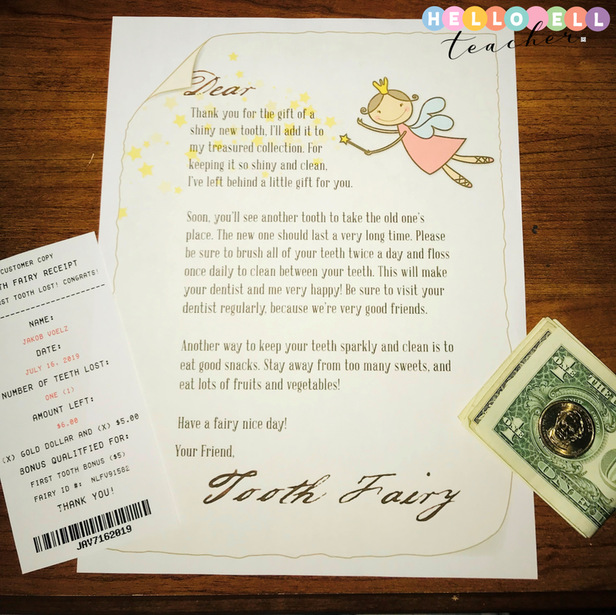 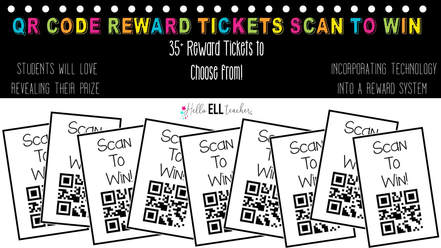 Want to start your school year in an exciting and motivating way while incorporating technology into your classroom management routine? These QR Code Scannable Reward Tickets (over 45 different types of rewards) will give your class the motivation they need! You and your students will want to be the firsts to use this new incentive! Each reward comes 10 to a page, select and print the rewards that suit your class from the master list. You'll be as excited as the students as they "scan and reveal" what they've won! EVERY student will want one! Prizes include: (open preview for complete list)` *sit at the teachers desk *work in the hallway *double rewards *sit next to the teacher *100% on an assignment *lunch with 3 friends in the classroom *special treat *movie during lunch *free/new book *homework pass *technology break *dance party *desk swap *wear a hat in class *play a game ***PLUS 33 more!!! These rewards are mostly free to you or of little cost from the teacher. Make them reusable by printing on cardstock and laminating them! All you need is a QR Code Reader App (free) and you're all set! (iTunes: QR Code Reader and Scanner) There are so many different uses for these QR Code Reward Tickets within the classroom such as, for classroom management, participation, excellence, etc! Print these blackline masters on white or colored cardstock. Print today...use tomorrow! (Your students will love you!) If there is anything missing or you would like to see other types of rewards, let me know and I can create more tickets.
Get it here: |
Nicole Voelz
Archives
June 2020
Categories
All
|

 RSS Feed
